Pixelmator Key Features:
Pixelmator is a layer-based image editor. You can quickly create layers from your photos, other pictures, from selections or even your iSight. Yes, Pixelmator can add a layer to your composition directly from your Mac's little camera. Not only can you link and arrange added layers, but Pixelmator allows you to blend layers, change their opacity, create clipping masks or even add layer masks to hide some portions of layer. It even has iSight compatibility so you can have it take a picture and add it as a layer for editing. Here are some key features:
- 1. Look and Feel: The user interface of the app is as beautiful to look at as it is easy to use.
- 2. Drawing Tools: full-featured drawing tools that allow you to easily create and edit any vector shapes.
- 3. Shapes: Use the Rectangle, Rounded Rectangle, Ellipse, Polygon, Star, Line or Custom Shape tools to quickly add shape layers to your compositions.
- 4. Take advantage of a breakthrough technology that helps magically get rid of unwanted elements in images.
- 5. Sponge Tool: Paint using any brush tip, either to add more color to or to take color away from objects, small details or any other areas of an image.
- 6. Burn Tool: Use the Burn Tool to naturally darken specific areas of an image-whether in the highlights, midtones or shadows range for a given area.
- 7. Red Eye Tool: easily-either automatically or manually-get rid of the red eye effect in your images.
- 8. Tools Customization: Make the app truly personal by adding, removing, arranging, even grouping tools in the fully customizable Tools palette.
- 9. Auto Save: lets you completely skip manual saving of your documents.
Supported Picture Formats by Pixelmator
PSD, JPEG, TIFF, PNG, WebP, PDF, GIF, BMP, TGA, JPG-2000
Supports Photoshop images with layers.
Optimize and save images for the web in JPEG, PNG, GIF, or WebP
Pros and Cons of Pixelmator
Pros
- Clean and Easy to use interface
- A powerful image editing app comes with many cool features
- Support Robust Brush, compatible with Photoshop brush too
- Export the photos to Mail, iPhoto, iDVD, and other apps/services like iPod, iPhone, iPad
- Fresh filters and clever filter interface
- Illustrator-style vector pen and shape tools
Cons
- Could not adjust the layers, some experts may need it
- Vector shapes cannot be filled with gradients
- Palettes do not snap/dock together
Pixelmator Screenshot
How to use Pixelmator
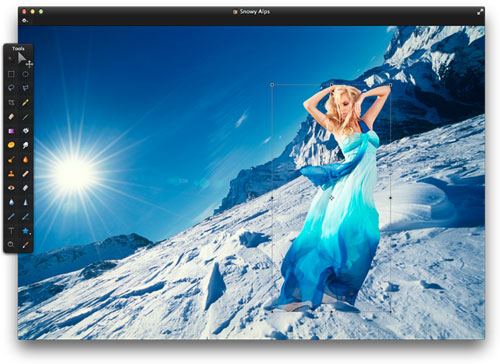
Part1. How to use Pixelmator to change backgrounds
- Open an image you want to change onto another background.

- To cut out an object from a colorful background, first make a selection of the object, using the Lasso or Polygonal Lasso Tool. Once the selection is made, customize it by choosing the “Subtract from” selection mode in the Tool Options bar and use any of the selection tools to remove the visible parts of the background that may still appear in the previously created selection content.
- In order to make the selection borders softer, choose Edit > Refine Selection and increase Feather and Smooth a little. Click OK. Open the image of the background on which you would like to place the selected object. To separate the selected object from the previous background and place it on the new background, do one of the following:
- Choose Edit > Copy. Then, choose Edit > Paste. Once the selection content is pasted, choose Edit > Deselect to get rid of the selection borders. The selection content will appear as a new layer in the Layers palette. Then, simply drag-and-drop the layer with the object from one image to another. Choose Edit > Copy. Next, open the image with the new background on which you want to place the object. Then, choose Edit > Paste. Hold down the Control key and click on the selection content to choose Layer via Copy. The selected object will appear as a new layer in the Layers palette. Then, simply drag-and-drop the layer with the object from one image to another. Layer via Copy is available in any contextual menu of the selection tools.
- Once you’ve placed an object on a new background, use the Move Tool (V) to position it anywhere in the composition. If necessary, choose Edit > Transform to change the size of a person. Once you’ve placed the object on its new background, use the Move Tool (V) to position it anywhere in the composition.
- In order to equalize colors for the whole composition, choose Image > Color Balance and experiment by dragging the sliders until the object’s color tone is similar to that of the background. Click OK when done.
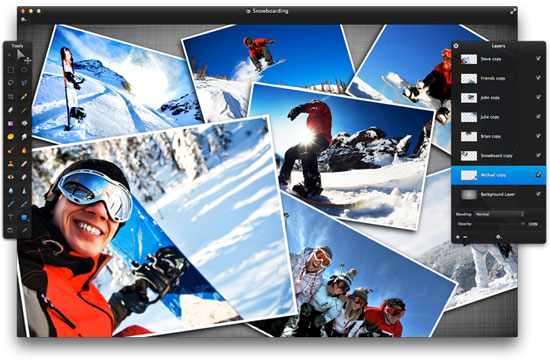
Part2. How to use to make Photo Collage
- Open a background image on which you will place the rest of the images. Add your favorite photos to the composition. Use the Transform Tool to adjust the size and angle of each image, and with the Move Tool place it into the right position.
- Add and arrange more images. Each image you add creates a new layer in the Layers palette. In the Layers palette, click and drag a layer to move it above or below other layers. Add border lines to the images. With the image layer selected, choose Edit > Stroke. In the Stroke dialog, choose the color white, set Width to roughly 7 px and select the Inside radio button to keep the border line inside the image. Repeat the same steps on all of the image layers.
- Add a realistic look to the collage by adding a drop shadow effect to each image: Duplicate the layer of the image. With the layer selected, choose Layer > Duplicate Layer. Fill the original image layer by choosing Edit > Fill; then, in the Fill palette, set the Color to black. Then check the Preserve Transparency checkbox to fill the image only and not the entire layer. Click OK.
- Move the layer a little to left and down. Tip: Use the arrow keys to move a layer by a single pixel. To smooth the shadow, Choose Filter > Blur > Gaussian Blur. Drag the radius slider to approximately 10 px. To reduce clutter in the Layers palette, merge the shadow and image layers for each photo. Command-click on each of the two layers to select them both and choose Layer > Merge Layers. Repeat the same steps until all images have their shadow effect.
- Make colors even crisper and more vibrant in your collage. To do that, use the Curves Tool. With the image layer selected, choose Image > Curves and play with the curve angle. Adjust the colors of all images, and the photo collage is complete!
Pixelmator Overview
Pixelmator is a layer-based image editor. You can quickly create layers from your photos, other pictures, from selections or even your iSight.
Try it Now, Free
Pixelmator System Requirements
-
- Mac OS X 10.6/10.7 or later
- At least 512 MB of physical RAM
- At least 100 MB of available space on your hard drive
"Strongly Recommended all the way! So beautiful to work with and super fast too. The best image editor for OSX. For me a Photoshop alternative and the price cannot be beaten."
Howard from USA
"Every Mac OSX users cannot ignore the best Photoshop killer - Pixelmator. The UI is so great to work with and its very intuitive. Every Mac OSX users should buy this software."
Susan from USA
Connect with MAC DVD Studio
![]()

![]()
![]()
Copyright © 2006 - 2018 MAC DVD Studio All Rights Reserved.