iTunes Troubleshooting - I Can't Sync iPod iPad iPhone with iTunes
![]()
Oct 11, 2014 12:12 pm / Posted by Nelson Peter to iTunes CategoryFollow @MacDVD_Studio
iTunes is a good file manager software for iOS devices like iPhone, iPod and iPad. You can use iTunes to sync videos, photos, songs, apps and contacts to your iDevices. But sometimes things go wrong, iTunes can't sync with iPhone iPod or iPad at all. If you have this problem, here is a step by step guide show you how to fix the iTunes sync problem, and this method works for both Windows system and Mac OS X.
Note: this tutorial is trying to solve the iTunes sync problem, not at problems with detecting the iDevices. If iTunes can't even detect your iOS device, please refer to this guide of iTunes detection. Now, let's start the guide.
Method1. Update iTunes to the newest version.
Sometimes just updating to the newest version of iTunes is enough to resolve all syncing problems, particularly if the desktop software hasn’t been updated in a while. You can download iTunes free from Apple website (http://www.apple.com/itunes/download/ )
After you download iTunes, install it and launch it. If the syncing now works but no file like songs, apps, music or movies is transferring to your iOS device, please follow these steps.
1. Go the “Summary” tab, check if “Manually manage music and videos” is enabled or not, if it is then try toggling it off and on again then manually drag a song to your iOS device to force manual syncin.
2. Look under the “Music”, “Movies”, “Apps”, “TV Shows” or respective tabs and be sure that “Sync Music”, “Sync Movies” etc is checked and enabled.
3. Try checking and unchecking those boxes, then hit the “Sync” button again.
If you install the newest iTunes and the syncing is still fails. you may need to authorize the computer with your own Apple ID. Please follow these steps.
1. Plug in your iOS device and launch iTunes
2. Pull down the “Store” menu and choose “Deauthorize This Computer”
3. Now go back to the Store menu and choose “Authorize This Computer”
4. Fill in the Apple ID and password information, then choose “Authorize”

Note: Authorize Compute tells Apple that the songs, movies, apps you have purchased belong to you, and you have the rights to them. So the files should be able to copied to your devices.
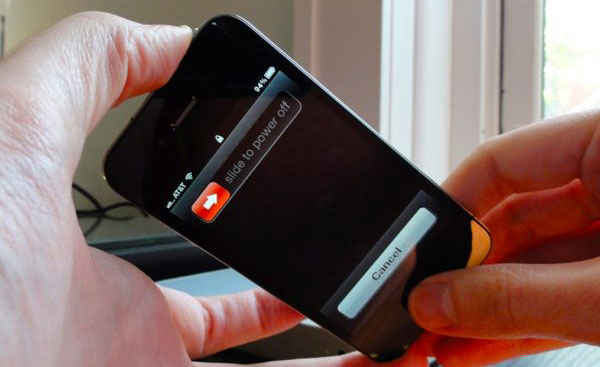
Method2. If update iTunes not fix the sync problem, you can reboot your devices. Just hold down the Power button and Home button simultaneously until the device restarts.
Method3. Restart your computer or mac. Restart computer can fix the issue to do with a malfunctioning daemon like the iTunesHelper Service or the AppleMobileDevice Helper process.
Method4. Try a different USB cable and USB port. Some of the cheaper third party cables are notorious for not working properly and leading to syncing problems, and even some of the Apple branded cables can malfunction after they’ve been in use for a long time.
Method5. If you just want to add some photos, songs and movies from computer to your devices, you can use an iTunes alternative to do the job. Here is an iPod/iPhone/iPad file manager, you can use it to sync files to your devices when iTunes not works. It has Mac version too.
Method6. Try another syncing method: Wi-Fi sync
If you don't know how to turn on the Wi-Fi sync. Just connect your iPod, iPhone or iPad to computer through the USB cable, and go to the Summary tab, check the “Sync over Wi-Fi” option.

Method7. Reset & Restore your iOS Device.
This is the last method to fix the sync problem. Reset & Restore will erase all the data on your device, so you need to backup your files first. Here are the steps to backup files. I took iPhone as example in this tutorial.
Backup iPhone with iTunes
1. Connect your iPhone to computer through USB and launch iTunes.
2. Select your iPhone in the 'DEVICES' list
3. Right clik your iPhone and select 'Back Up'. Then iTunes will automatically backup your files, and this process will take a few minutes.

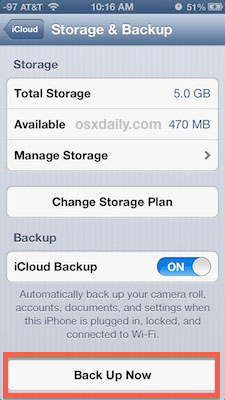
Backup iPhone with iCloud
1. Connect your iPhone to a power source and make sure your iPhone is on a Wi-Fi network
2. Open Settings, then go to iCloud, followed by “Storage & Backup”
3. Tap the “Back Up Now” option to start a new backup from the iPhone to iCloud
After the backup is finish, reset the iPhone to factory defaults by going to Settings ' General ' “Erase All Content and Settings” – this will erase everything on the iPhone and return it to the factory defaults as if the device was brand new. Then restore the iPhone by using the backup you just created.
Note: Resetting and restoring is the last troubleshooting step you should take yourself, and if things still are not working properly then go ahead and contact the official Apple support line or visit a Genius Bar to get things sorted out.


