Download and install the Photo Editor, and then launch it, you will see a window as below:

Here are 3 modes to use the software
Mode 1. Create Collage: Start creating a new collage;
Mode 2. Quick Collage: Let the program imported photo from your iPhoto directly
Mode 3. Choose Open Project: Launch the project you edited last time for further editing.
This guide will take mode 1 "Create Collage" as sample to show you how to use the Photo Editor.
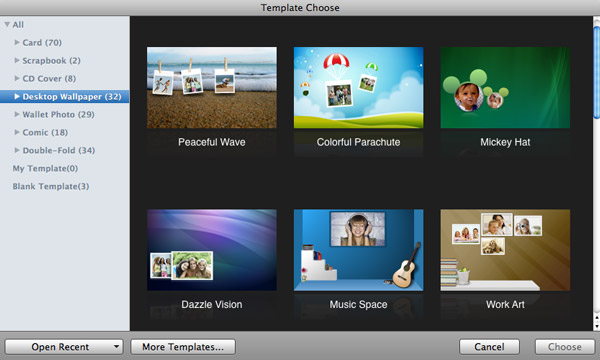
Step 1. Choose a template and import photos: Choose the template Card or Scrapbook you like. Double click the template to select it. Drag photos to the selected template. You can add photo from iPhoto, iSight or any other folder.
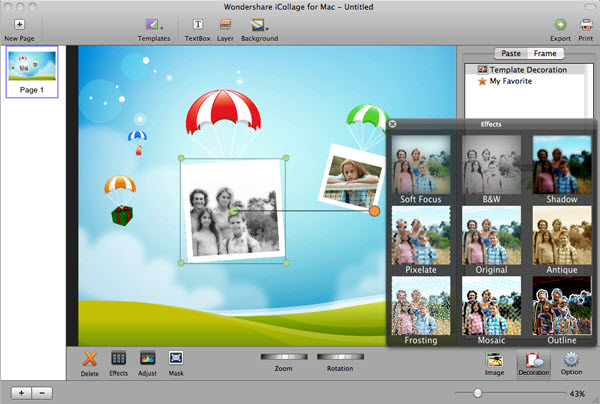
Step 2. Edit photos and collage: You can Rotate or Zoom the edited photos or the whole frame. You can add photo effects, add mask effects, adjust the exposure, color, etc. of your photos as well. Besides, decoration elements can also be added, deleted, zoomed or rotated.
Step 3. Choose output format: After editing, you can click Export and choose the place to save your pictures. You can also choose to upload the pictures to Flickr, Facebook, send them with E-mail or export to PDF format. Of course, you can print them out if you have your own printer.


