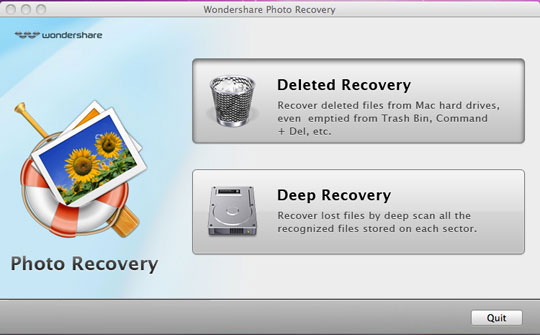
- Step1. Select Recovery Mode
After you download and install the Photo Recovery for Mac, launch it. After you download and install the Photo Recovery for Mac, launch it. There are too modes to recovery your files. Select one according to your need.
Deleted Recovery - Recover deleted photos only on Mac hard drive with HFS+ file system.
Deep Recovery - Deep scan and perform Mac photo recovery on all kinds of file systems, such as HFS+, FAT, and NTFS.
- Step2. Select Recovery Target and Type
Select the device where you want to recover your photos from.
Choose the file type. All types are selected by default. You can click the button to select the types or cancel the selection. Gray background color means the type is selected. Click 'Next' to start automatic scanning.

- Step3. Preview the recoverable photos
For Deleted Recovery, if you remember the file name, you can search the file by its name to find the target photos precisely in a short time.
For Deep Recovery, you can sort the file list according to size and date.
Caution: The scan results are temporary in memory. If you click 'Back', the scan results will be lost.
- Step4. Save your recovery photos
Select or enter a directory to save the photos, videos and music files that you need. For Deleted Recovery, you can recover with original directory. Also you can enter a new entry by yourself.

- Tips: We highly suggest that you should select a directory that is located in a different partition from the source partition.